unit 1 is prepared using information from
‘Promise & Fulfillment: formulas for real bread without gluten’
ISBN 9780648554905
Promise & Fulfillment – front cover 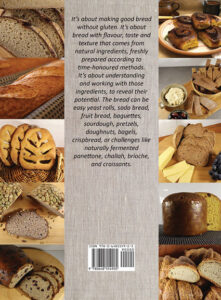
Promise & Fulfillment – back cover
Resources from this book are reproduced and used with permission of the author and the publisher.
the process of making bread
overview
The basic process for making dough and baking bread is as follows:
Each part of the process influences the final bread. Some parts have obvious influences, others are not so obvious.
_ _ _ _ _ _ _ _ _ _ _ _ _ _ _ _ _ _ _ _ _ _ _
working with the process.
By varying the preparation, times, temperatures, and techniques we can adapt the basic process to develop different styles of bread.
Adjustments that may be made at each step may include:
- adding or changing desired ingredients (it is better not to do this unless you know the characteristics of each ingredient, and how the addition or change is likely to affect the outcome)
- increasing or reducing the quantity of each ingredient
- extending or reducing the time of an activity
- increasing or reducing the temperature for an activity (time and temperature are linked: increasing temperature may require a reduction in time; decreasing temperature may require an increase in time)
- working the dough more, or less
- using manual or mechanical mixing or kneading
- managing humidity during fermentation or baking
- managing the process of cooling
When the bread we produce doesn’t meet our expectations, the reason for that difference will be in one of the parts of the process.
preparing to bake
Preparing to bake is when most of the important thinking is done, key choices are made and everything needed for the bread is gathered together.
Key choices are:
1. What sort of bread do I want to make?
2. What about the recipe, formula and method?
– do I have a recipe to make that sort of bread?
– do I need to get the recipe?
– do I need to adjust a recipe?
3. What ingredients do I need?
– are there any ingredients in the recipe, or formula, that cannot be eaten by the people I’m baking for?
– do I need to substitute ingredients?
– if I need to substitute ingredients, do I know the most satisfactory substitutes?
– if I need to substitute ingredients am I prepared for the first few bakes to be less than satisfactory while I get the substitutions right?
– do I need to purchase ingredients: to prepare the leaven, to prepare the dough, to finish the bread?
– do I need to prepare ingredients?
4. What equipment do I need?
– have I read carefully through the recipe to check that I have the equipment needed for each part of the process?
– do I need to buy equipment?
– can I ‘make do’ or improvise with what I have
Here are some examples:
# If I have a few mixing bowls, and clean cloths, do I need to buy a banneton?
# If I need to keep the starter or the dough warmer than the room temperature, do I have a heat pack or hot water bottle, and towel, a thermometer and a large insulated container (picnic icebox? storage container wrapped in towels?) that I can use to improvise a proving box?
5. How long will it take?
– often individual activities in bread making are spaced hours apart; the total time to produce a long-fermented loaf may be more than 24 hours, but the total ‘hands-on’ time might be as little as 5 minutes)
6. Can I fit the schedule into my routine/ activities for the day?
– how can I work the bread-making process into the time I have available; even a quick bread requires dedicated time for hands-on work, and it may require more focus over a short period of time to ensure the recipe process is followed properly.
– do I need to work out a schedule for preparing the leaven, the dough, and for baking?
7. Will it help me to make and keep notes for my baking?
building the dough
With all the preparation done and all the equipment and ingredients assembled; with the leaven prepared we can begin combining the ingredients. Be sure to read the recipe, formula or method very carefully. There are many different approaches, and each one is used for different reasons. The original recipe developer will have good reasons for the approach taken, though that may not always be clear.
The essential part of making dough is to get the liquid well mixed into the flour. If someone talks about ‘hydration’ of the dough they are talking about how well the mixing has been done. Hydration is about more than simply mixing water (or some other liquid with a water base, like milk or even fruit juice!) into the flour, it is about working the dough as it forms to ensure the liquid is absorbed into the flour.
You may have heard some people suggest that gluten-free dough doesn’t require kneading. That is not really correct. While there is no requirement to spend a great deal of time and energy kneading gluten-free dough, there is a requirement to mix the dough well and to knead the dough a little. This helps to cause the liquid to be absorbed into the flour particles, and to further deform and break down those particles. Extended mixing or kneading is usually done in the first half-hour of the life of the dough. This results in a smoother, more flexible dough.
Of course, where the dough is a batter, extended mixing may also help to ensure a better final structure of the bread.
Usually, the work of kneading gluten-free dough doesn’t require a bread machine or a stand mixer. These are not essential tools, but may be used. Most bread dough can be adequately mixed and kneaded by hand or with a handheld dough whisk. When the dough has been built it is then allowed to ferment.
fermenting the dough
As soon as we wet the flour the processes associated with fermenting begin. It is helpful to remember that when we make flour from seeds, the flour was a living organism that could have become a new plant. All the components of the seed are part of the process of making a new plant. So, the enzymes in the seed that would have broken down starches in the seed to make sugars used to feed the growth of a new plant, are still there. When we wet flour we start those enzymes working, and the processed that would have resulted in seed germination instead begin the process of fermenting the flour.
When we build dough we usually inoculate the dough with a leaven of some sort. The leaven quickly harnesses the available food products and begins the process of fermentation in a way that reduces the likelihood of undesirable outcomes. We could simply add water to the flour and wait. Fermentation would occur, but the outcome might not be so consistent from one batch of dough to the next. When we inoculate the dough with a prepared yeast, or with a prepared yeast and bacterial culture we are eliminating most of the uncertainty of how the dough can ferment. Each of the yeasts and bacteria produces products that influence both the rise and the flavour of the final bread.
We can control the fermentation by:
– the amount of leaven we use to inoculate the dough (more will speed up fermentation, less will allow a longer fermentation)
– the hydration (higher hydration dough – more water in the dough – will ferment more quickly than lower hydration dough)
– the temperature of fermentation (each yeast and bacteria has a preferred temperature range for growing and multiplying – cooler conditions may slow some down or may favour others, in a similar way warmer temperatures will increase the activity of some and not others)
Unless we are working with a batter, fermentation of the main dough is usually organised into two stages:
1. the main, or bulk fermentation (‘bulk’ refers to a large mass of dough that is later divided into loaf sized portions, or smaller).
2. the final fermentation, often referred to as proving, or proofing (this is the fermentation after the dough has been shaped before it is baked).
shaping the dough
When the main fermentation is complete the dough is shaped. Sometimes shaping is preceded by scaling, where the dough is divided into smaller portions as loaves or as rolls or buns.
If the quantity of dough is more than the amount required for one loaf or bun, the dough is divided into smaller portions. This may be done by ‘eye’, by estimating, or by using scales. It depends on the level of accuracy required by the baker.
When the dough has been divided into the required sizes the pieces of dough are shaped, by a process of spreading, folding and rolling into the final shape.
The strength of the dough will determine the size and shape produced. Most free-form doughs perform best if the cross-section of the dough is no more than 9cm when it is shaped. Some doughs are quite delicate and need to be shaped to a smaller cross-section of between 3cm and 5cm. Some doughs will collapse if they are prepared into a size and a shape that is too large for the strength of the dough.
proving the dough
Just like the earlier fermentation, we might adjust the final fermentation time, temperature and humidity to produce the final dough for baking. A warmer final ferment will prepare the dough more quickly and may help open the structure of the final crumb. It may also over ferment or over-prove the dough. Cold proving can be used to extend the final fermentation. Cold proving can also be a useful technique to assist in scheduling the final bake. Sometimes it may improve the flavour and texture of the dough.
If the bread is free-form, the dough is often placed in a cloth (couche, generally a length of coarse linen), or in a proving basket (banneton, generally made of cane or willow, but often made from plastic; a proving basket may be lined with cloth) for the final fermentation. The cloth or proving basket allows moisture to be lost from the skin of the dough. This slightly dried dough skin helps to form the crust when the dough is baked.
If the dough is being baked in a loaf pan, or a similar dough form, the main fermentation may be shortened and the final fermentation may be lengthened to allow a more open crumb to be produced in the pan.
Over-proving (fermenting for too long) will result in a more delicate dough with a weaker final structure.
Checking the dough to see when it is ready can be challenging. One effective method identified and used by Breadarchitect is to gently caress the dough with the palm of one hand, or with the flat of the fingers: When the dough is ready for baking it feels soft and tender to the touch. (This is a very subjective measure that takes practice to appreciate.)
baking the dough
There are a number of techniques that can be used, during baking, to adjust and manage the quality of the final bread.
The expansion sometimes called ‘oven spring’, usually takes place in the first 15 minutes of baking. Scoring (cutting/ slashing/ scoring) the dough skin gives the baker control over the location and direction of dough expansion in the oven. If the dough skin is not scored the expanding dough will tear the dough skin and break through the forming crust where there are weaknesses. The aim of scoring it to allow the dough to expand evenly to create an evenly open crumb structure. Scoring can also be used to present attractive designs on the crust. The length, depth and direction of scoring all contribute to developing final crust and crumb of the bread.
Management of temperature, time, and humidity can be used to change the qualities of the final bread.
Adding steam to the baking chamber is a technique used to:
– improve the crust,
– allow the crumb to expand a little more due to the softening of the dough skin during the early stages of baking,
– enhance the colouring of the crust.
Increasing the oven temperature for the initial baking period can enhance oven spring. Reducing the temperature during the bake, and extending the bake time can assist in ensuring the dough has completely baked.
As a rule-of-thumb, the centre of the bread should reach around 97degrees C by the end of the bake. Usually, this indicates that the starches in the crumb have gelatinized and set. However, there are sometimes conditions when this rule-of-thumb may not work. If the dough is too wet, a high temperature may be recorded, but the crumb remains wet and gummy. If this happens there are usually other factors to be considered.
cooling the bread
Different types of bread are managed differently when the bake is complete. Some are eaten when still warm, others are rested for 24 hours or more to ‘season’ after baking. Some bread is cooled on a rack, others might be cooled in a cooling oven.
Cooling the bread allows excess moisture to leave the bread as steam. Some bread may be made with flours that hold more moisture, but which fail to incorporate the moisture in the baked crumb or to release the moisture as steam. Such a bread can benefit from being allowed to rest for a day after baking. Allowing longer for the bread to rest after baking, before cutting the bread can allow the bread to dry, or allow the moisture in the crust and crumb to equalize, softening a hard crust and reducing the wetness of the crumb. Some pan loaves are removed from the pan and returned to the cooling oven for a short time to allow the crumb to shed moisture and allow the crust harden slightly.